Canvas
The canvas provides a high-level view of all nodes and their connections. When an iteration is selected, you can see where failures occurred, view error messages, and track progress for each node. It is the primary environment for designing workflows using drag-and-drop.
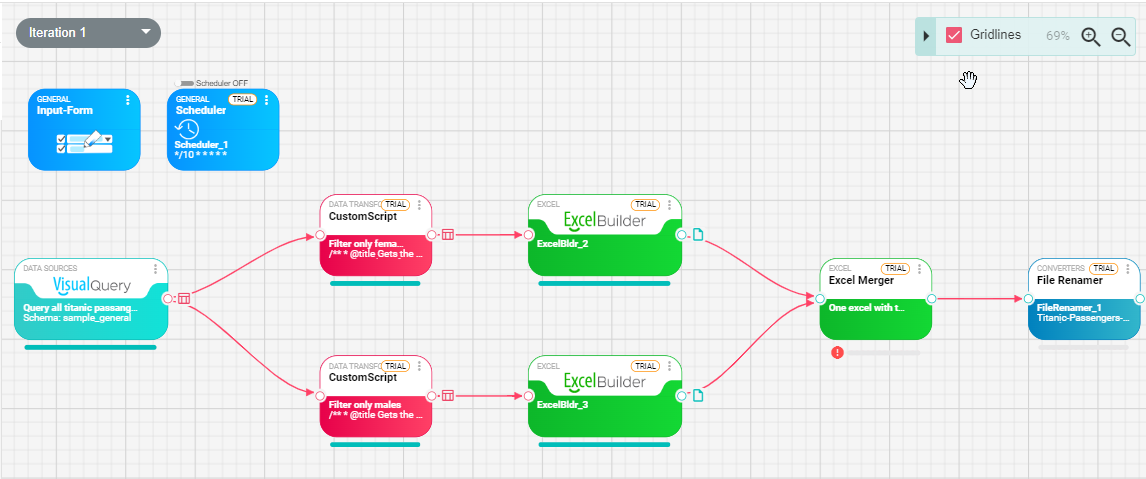
The screenshot above shows a canvas with multiple node types and a selected iteration with its data loaded.
Add Node to Canvas
To add a node to the canvas, drag it from the Toolbox on the left side, which contains all available nodes in the system.
Use the search field at the top of the toolbox to filter nodes:

Connecting Nodes
After adding two nodes to the canvas:
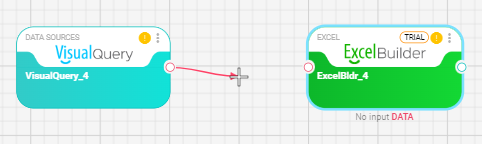
Drag from the output port of the first node (in this example, VisualQuery_1). A connector line follows the cursor:
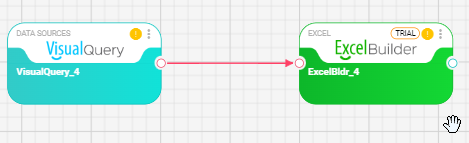
connect this to the input of the ExcelBuilder_1 node and then a connection will be formed like this:
UI Elements
Node Elements
-
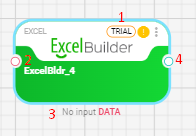
Configuration warnings for the node (e.g., "Node is not configured" or "Node is disconnected").
-
The input port. Hover over the port to see the expected input type (DataFrame, NodeFile, etc.).
-
The execution progress bar. Runtime messages appear next to the progress bar:

Hover over the icon to see the detailed message. A node can generate multiple warnings, information, and error messages simultaneously.
-
The output port. Not all nodes have an output port. Hover over it to see the output type.
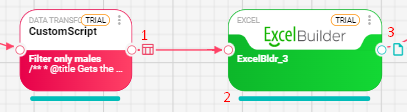
- The Custom Script node outputs a DataFrame (indicated by the DataFrame icon). Click the icon to view the data in the bottom panel. For more details, see the Run Details section.
- The execution progress bar showing the percentage completed for the node.
- The ExcelBuilder node outputs a file (indicated by the file icon). Click the icon to download the file from the Run Details panel.
Undo/Redo
Any operation performed on the canvas can be undone, including changes made inside a node's settings.
The undo/redo buttons are located at the top of the canvas:

Autosave
To prevent loss of changes, autosave is enabled by default. Every action is automatically saved and can be reversed with undo/redo.

Sticky Notes
To add a sticky note, right-click on the canvas. The context menu appears:

Click Create Note to add a note to the workflow:

The note can be edited, recolored, or deleted. Click the three-dot menu for additional options such as copy and duplicate.